I Stalk

Popular Posts
-
Bubbles Forum Set This tutorial was written by me with Paint Shop Pro X, and any similarities to other tutorials is purely co...
-
I made these templates a couple weeks ago for a challenge in one of the forums that I belong. They're just simple templates, but ther...
-
This is a tutorial I made for the Creative Addictions Forum as a mystery tutorial, and thought I'd post a link to it here. The...
-
I had so much fun making my last forum set template, I decided to make another :) Here's a preview of the set. You can downlo...
-
This isn't a new tutorial, it's one I made for the Creative Addictions Forum a while back as a mystery tutorial, and thought I'...
-
 Here is a tag I made with an amazing kit by Dees'Sign Depot called Just The Girls. Here's a preview of the kit which is ava...
 -
I have a couple FTU Cluster Frames for you today! Both were made using Chichi Designz fabulous kit called Tropic Fever. Here's a pr...
-
I'm still kinda new to making templates, so mine aren't the greatest. But I was in the mood to make some Halloween ones today, an...
-
 This tutorial was written by me with Paint Shop Pro X, and any similarities to other tutorials is purely coincidence and unintent...
 -
I had a play with this great steampunk kit by Carita Creationz called Steampunk Junkie. Here's a preview of the kit which you can get...


February 05, 2014
Here's a forum set that I made using the artwork of Tamandya and a beautiful kit called I Love You Beary Much by Kissing Kate.
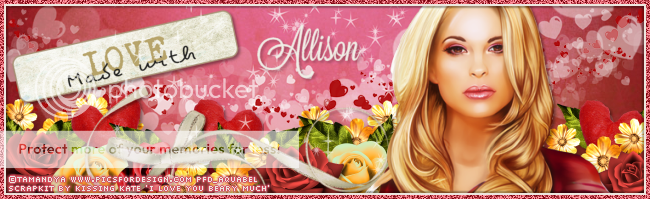
TUTORIAL - MADE WITH LOVE
This tutorial was written by me using PSP X, but any version should work.
Resemblance to any other tutorial is purely coincidental.
This tutorial assumes a good knowledge of PSP and tagging.
Resemblance to any other tutorial is purely coincidental.
This tutorial assumes a good knowledge of PSP and tagging.
Supplies:
Tube of Choice: I am using the artwork of Tamandya, license and tube available at PFD.
Kit: PTU kit I Love You Beary Much by Kissing Kate, available at The Art of Spazz store or Tiny Turtle Designs.
Font: Lavanderia available here
Eye Candy 4000 Gradient Glow
Tube of Choice: I am using the artwork of Tamandya, license and tube available at PFD.
Kit: PTU kit I Love You Beary Much by Kissing Kate, available at The Art of Spazz store or Tiny Turtle Designs.
Font: Lavanderia available here
Eye Candy 4000 Gradient Glow
Unless otherwise stated, I have used a Drop Shadow with settings of: 3,3,40,4, color black.
For sharpening resized tube/elements, I have used Unsharp Mask with settings of: Radius 3, Strength 30, Clipping 3, Luminance Only unchecked.
Let's get started!
For sharpening resized tube/elements, I have used Unsharp Mask with settings of: Radius 3, Strength 30, Clipping 3, Luminance Only unchecked.
Let's get started!
Open a new image 650 x 200.
Copy and paste Paper 5 as a new layer.
Copy and paste Element 48 and place at about the middle.
Copy and paste the following elements, rotating where necessary, resizing by the given percentages, and sharpen.
Copy and paste Paper 5 as a new layer.
Copy and paste Element 48 and place at about the middle.
Copy and paste the following elements, rotating where necessary, resizing by the given percentages, and sharpen.
Element 68 - resize by 25%, flip
Element 79 - resize by 35%, do not add a drop shadow
Element 72 - resize by 25%
Element 74 - resize by 20%
Element 73 - resize by 18%
Element 65 - resize by 5%, rotate slightly
Element 79 - resize by 35%, do not add a drop shadow
Element 72 - resize by 25%
Element 74 - resize by 20%
Element 73 - resize by 18%
Element 65 - resize by 5%, rotate slightly
Now use my tag for placement, moving the elements up or down the layer palette where needed.
Duplicate and mirror where necessary. Add drop shadows to all except Element 79 (and do not mirror this element either)
Duplicate and mirror where necessary. Add drop shadows to all except Element 79 (and do not mirror this element either)
Copy and paste Element 27, rotate so that the bow is almost horizontal, then mirror. Resize by 60%, place above all flower layers (use my tag for placement), sharpen and add a drop shadow.
Copy and paste Element 78, rotate to the left slightly, and resize by 45%, sharpen and add a drop shadow. Use my tag for placement.
Copy and paste Element 80 above all layers.
Now copy and paste your tube, resize to your liking, sharpen.
Place your tube to the right.
Duplicate your tube and apply a Gaussian blur of radius 5 to your duplicated layer.
Change the blend mode of the duplicated tube layer to Soft Light, and reduce the opacity to 30%.
Duplicate your Soft Light layer, and change the blend mode to Screen.
Now go back to your original tube layer, go to Selections --> Select All --> Float --> Invert.
Now go to your Soft Light layer and hit Delete, then to your Screen layer and hit Delete again. Select None.
Now merge all 3 tube layers, but do so in this order:
Merge the Soft Light layer with the original tube layer, then merge the Screen layer with your Soft Light/Original merged layer.
Add a drop shadow.
Now we need to crop the entire image.
To do this select your crop tool, draw your crop tool around the entire image and double click.
To do this select your crop tool, draw your crop tool around the entire image and double click.
Now add a new layer above all other layers, and flood fill with colour: #ece6de.
Selections --> Select All --> Float --> Modify --> Contract by 6, hit Delete, Select None.
Add a drop shadow with the following settings: 2, 2, 30, 2, colour: black, then again with these settings: -2, -2, 30, 2, colour: black.
Selections --> Select All --> Float --> Modify --> Contract by 6, hit Delete, Select None.
Add a drop shadow with the following settings: 2, 2, 30, 2, colour: black, then again with these settings: -2, -2, 30, 2, colour: black.
Add a new layer above all other layers, and flood fill with colour: #d25467.
Selections --> Select All --> Float --> Modify --> Contract by 4, hit Delete, Select None.
Add noise with the following settings: Uniform, Noise 70%, Monochrome checked.
Selections --> Select All --> Float --> Modify --> Contract by 4, hit Delete, Select None.
Add noise with the following settings: Uniform, Noise 70%, Monochrome checked.
Add your copyright.
Add your name - I used Lavenderia with colour #ece6de and add a drop shadow.
Save as a png or jpg.
Add your name - I used Lavenderia with colour #ece6de and add a drop shadow.
Save as a png or jpg.
Don't close your pspimage, as we'll need it to make the avatar.
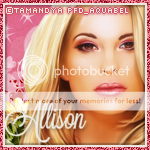
AVATAR
Open a new image 150 x 150.
Go back to your banner image, and hide your 2 border layers, your name and your copyright.
Select Edit --> Copy Merged.
Now go to your avatar, and paste as a new layer.
You'll now have your banner image in your avatar. So move it around until you have your tube showing, and place to your liking.
To make the border, follow the same instructions as for the banner image, with a couple slight changes.
Add a new layer above all other layers, and flood fill with colour: #ece6de.
Selections --> Select All --> Float --> Modify --> Contract by 5, hit Delete, Select None.
Add a drop shadow with the following settings: 2, 2, 30, 2, colour: black, then again with these settings: -2, -2, 30, 2, colour: black.
Selections --> Select All --> Float --> Modify --> Contract by 5, hit Delete, Select None.
Add a drop shadow with the following settings: 2, 2, 30, 2, colour: black, then again with these settings: -2, -2, 30, 2, colour: black.
Add a new layer above all other layers, and flood fill with colour: #d25467.
Selections --> Select All --> Float --> Modify --> Contract by 3, hit Delete, Select None.
Add noise with the following settings: Uniform, Noise 70%, Monochrome checked.
Selections --> Select All --> Float --> Modify --> Contract by 3, hit Delete, Select None.
Add noise with the following settings: Uniform, Noise 70%, Monochrome checked.
Add your name - I used Lavenderia with colour #ece6de and add a drop shadow.
Save as a png or jpg.
DONE!!!
I hope you've enjoyed this tut.
If you have any questions or find a mistake, please feel free to send me an email.
Also, I'd love to see any tags made using this tut, so again, please
feel free to email me your creations, or post the link to your tag in
the comments below.
~Allison~
Subscribe to:
Post Comments
(Atom)
Grab My Blinkie


My Groups


I CT For
Favourite Blogs


Favourite Stores


My Fav Avatars


wouuu beautiful !! Thanks !
ReplyDelete